Monday, 27 April 2015

Sash Display

The Iron Craft challenge this fortnight was to create something for the home. I've had a bit less time than usual to work on this and there wasn't really anything I was inspired to make for my house, so I put it off until almost the last minute.

On Sunday both my little miss and the little guy competed in an Irish dancing competition. It was the little guy's first actual competition and he was great! He was so excited when his name was called out and he got his ribbon. He said he must have done extra good because it was a red one (his favourite colour) - too cute! The little miss had a great day and she won her first large sash. She was beyond thrilled, especially since she was competing against girls not only her age, but also a year older. So this was my inspiration.


The little miss has quite a collection of ribbons, skinny sashes, a few medals, and now a large sash; and until now they've all just been sitting on a shelf. We went out and bought a cork board and I was going to cover it in some nice fabric for her, but she said she wanted to leave it as is because she would have it completely filled up before long. Good on her! But there goes that idea... I did some searching on Pinterest for display ideas for the long skinny sashes and found some really cool quilts made from them - the little miss loved that idea, but we both thought waiting until she earned a few more to make a larger quilt would be better. So we came up with the idea of just plain hanging them on the wall over some string. And now for my craft challenge creation... I grabbed some of the wooden laundry pegs, some ribbon, and my trusty craft glue and made some simple (but better than plain wood) pegs to hold the sashes in place. Simple but effective and the little miss loves it.


The big sash & little ribbons.
 

Tuesday, 14 April 2015

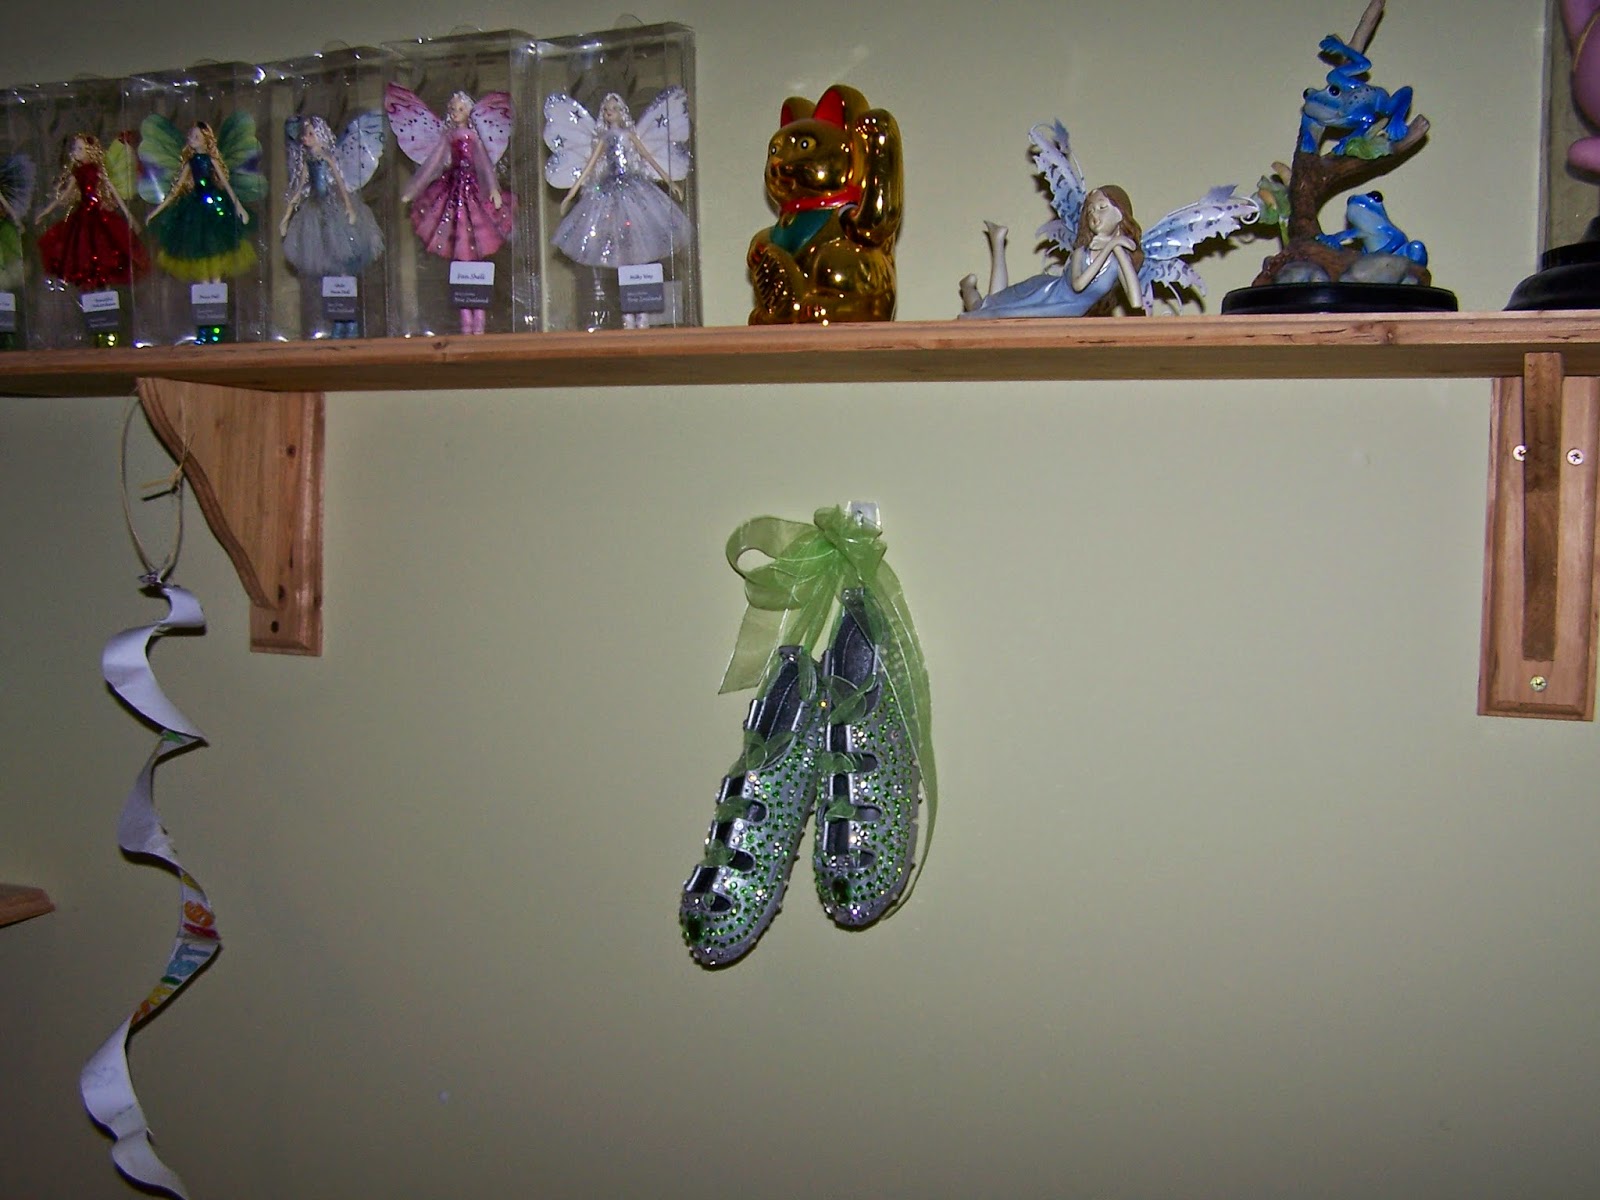
Decorated Dancing Shoes

The latest Iron Craft challenge was to "Make a project using a technique, material or subject that begins with the letter D." So of course the first thing I thought of was to do something dance related... I remembered seeing some blinged out dancing shoes on Pinterest and decided I'd go with that.

I went to Pinterest to find the original pin that sparked my interest and instead I found a different pin with framed shoes covered in pink glitter. They were absolutely gorgeous and I was just about to start planning my sparkle shoe project when I remembered I hate working with glitter! Not only does it get everywhere while you're working with it, but it continues to spread the sparkle 'joy' forever... I knew that the finished shoes would end up hanging in the little miss' room, and I could just imagine them spreading their 'joy' all over her room - and not in a good way! So I went back to the original idea of blinging them out with crystals.

New Irish dancing shoes are not cheap, but the little miss had a pair that no longer fit her that were in decent enough condition, so I decided to use those. They had been taped up a bit at the toes and on the bottom as they had been her busking/outdoor preforming shoes, and once I took the tape off the finish wasn't looking too hot anymore. So instead of polishing them up I spray painted them silver (as I coincidentally had a little bit left over from a different project). After two coats of spray paint the shoes were ready for blinging!

The little miss wanted the shoes to be green, of course, so I went to my favourite online bling shop (Rhinestonz & Beads) and started perusing the green crystals on offer... I didn't want the finished shoes to be too dark, so decided on peridot. Because it's just a craft project and doesn't need massive stage sparkle I went for the options that were budget friendly. I went for a 350 pack of Perciosa 8cut ss16s (they were on clearance), 100 Arabesque ss20s, and two larger acrylic accent stones. I used just plain old craft glue as I found it worked better than Gem-Tack (which I usually use for my blinging); as it's tackier and dries quicker than the Gem-Tack.


I thought that 452 stones would be enough to decorate a pair of tiny size 8 shoes, but I was wrong. Thankfully I had a stash of crystal Arabesque ss20s to fill in a few gaps! The final crystal count on the shoes was 627. Don't ask me how I ended up using an uneven number, it hurts me to even think that one of the shoes in the pair has one less crystal on it.

Thankfully I always separate my project crystals into even piles so that I don't overuse in one area and run out before I get to the next section... 

I had a plan in my head as to the pattern I was going to make with the crystals, but had to make some ad-hoc changes as I went when I realised that my purchased crystals were not going to go as far as I had thought. I was very glad for my fairly sizable stash of  plain crystal Arabesques, which not only saved me from having to wait for more crystals to arrive, but also helped keep the cost from getting out of hand.


After leaving them to dry completely overnight, I laced them up with some fancy ribbon to match and hung them in the little miss's room.


Overall I'm happy with how they turned out - especially for a first try. But the cost of the crystals (even using budget options) was a bit higher than I had hoped. It almost made me think I should have gone back to the glitter idea. Almost.


*note: if you want to check out the other decorated Irish dancing shoes I've pinned, you can find them on my Pinterest Irish Dancing board here.

Thursday, 9 April 2015

Iron Craft Catch Up

I knew I wasn't going to be able to blog every Iron Craft challenge I completed, but I will do my best to blog the big projects and some of my favourites. I'm so excited about the current craft challenge, but can't post a write up about it until reveal day (which is next week).

In the meantime, here is a round up are the challenges I've completed so far, that weren't lucky enough to get their own blog post in time for reveal day...

I always find this kind of challenge difficult as I already do so many crafts!!! There's always more I want to try, but the cost &/or accessibility of materials usually gets in the way. So for this challenge I decided to use a new technique for something I already do... I blocked some items that I had crocheted. I am a self taught crocheter and never really thought I needed to block stuff - it seemed like an unnecessary additional step. It wasn't too much of a pain to do (except for rendering the dining table unusable for the duration), and I'll do it again - but not for every project. 

The challenges are obviously dreamed up in the Northern Hemisphere, because in my world it's more like dreading winter... I was running very short of time with this one too as I was busy making crafts for my kids' school gala as well as for the Little Sprouts Easter Country Fair. I decided that some of the badges I was making for these events looked a bit spring-like, so used them as my challenge entry. 
These badges were made in the same way as my key tags tutorial (found here), except they have a broach pin on the back instead of a ribbon & key ring.

The reveal day for this challenge was on St Patrick's Day, and you'd think with my little Irish dancers in the house I would have done something Irish; but no. We're all pretty kitted out with St Patrick's Day stuff in this house, and I was still super busy with the gala & fair crafts, so I decided to make some of my gala baking green instead. I made the little miss' absolute favourite peppermint fudge - which, surprise, surprise, is green. It's super easy to make and is sooooo yummy. And it looks cool too, if I do say so myself.
For this challenge I made myself some finger-less gloves. I've been meaning to make myself a pair for ages, so figured this was a good opportunity - especially with winter creeping up. And yes, I seem to have gotten stuck on the green theme.

And that brings us to Challenge #7 - "D" is for. I'll give you a hint... it's something to do with dancing. You'll have to wait for reveal day which is officially April 14th, but for those of us in the NZ time zone it's not until the 15th. 

Dragons!

A few months ago the little guy turned 5 and we had a "How to Train Your Dragon" birthday party for him. Many hours were spent browsing Pinterest and the internet in general, and we came up with a few games/activities to keep the kids busy. But first Mr almost 5 insisted on a Toothless costume...

So I made one up as I went. I was originally going to have the wings on the back and the sleeves would be Toothless' front legs, but the little guy wanted wings he could flap with his arms and I realized that was going to be way easier to do, so we went with that... The 'top' over laps in the front and does up with a bit of velcro at the neck. The tail goes on like a belt and again does up with velcro. Once Toothless was finished the little guy requested his sister be Stormfly, but that was just a bit beyond what I was willing to do, so we rummaged through the little miss's closet and came up with an Astrid costume instead.


On party day we set up a shield decorating station where the kids could decorate their own shields. This was good to get the kids involved in something as soon as they got in the door, and also kept them busy while waiting for the other dragon trainers to arrive. I pre-made the shields from cardboard, tape & ribbons so the kids could hold them on their arms. We just put out our stock of coloured pencils & markers and the kids loved it.


Next the kids needed to earn a sword to go with their shields, so we played pin the tail on the Toothless. I had planned to make swords, but then I found some inflatable ones for $1 each and figured there was no way I could make anything for cheaper, and they were nice and safe to be played with even after the inevitable sugar rush. Everyone got a sword, but they were handed out in order of who got Toothless' tail closest to the right spot.


After a bit of sword fighting mayhem, we played another game... Feed the Gronckle. Every good dragon trainer knows that gronckles eat rocks, so I made up some rocks out of scrunched up newspaper covered in tape. I printed out a picture of a gronckle and stuck it to a large box. I cut out the bottom of the box and also the mouth of the gronckle, and the kids took turns throwing rocks into the mouth. It was great fun, and the kids kept going back to this one throughout the party.  


 And then one last organized game before cake time... It was our own little version of sheep racing.
The kids lined up into two teams and took turns putting a sheep pom-pom between their knees and delivering the sheep past the line placed at the other end of the room (without using their hands). If they dropped their sheep they had to go back and start again. Again, lots of good fun and the kids really worked together to help each other out with this one. It was pretty much impossible to get a photo of this one, sorry... But then there was cake, a fire breathing cake even!


The party finished up with opening presents and then running around the deck and more sword fighting - fortunately the hanging balloons were a favourite target.