Showing posts with label Kids. Show all posts

Tuesday, 26 May 2015

Iron Craft 2015 #10 - E is for...

E is for... Eye-masks!


The 10th Iron Craft challenge for 2015 was to craft something around the letter E; using materials or techniques starting with the letter E, or make something starting with E like I did. For this challenge I made eye-masks!

The little miss and I are off to Australia for the Australian International Oireachtas, and we're travelling at some pretty hideous hours, so I though some eye masks might help us to catch a little sleep when we can. The little miss requested a cat mask and I just wanted something plain, but still cute.

It was a perfect way to use up some fabric scraps and it was a nice, quick project. There are no shortage of eye-mask tutorials on the internet, and many different styles to be found on Pinterest, but I pretty much just made mine up as I went - I did take some inspiration from the many photos I looked at though!

I should know better than to try and take photos while she's watching Harry Potter!

Thursday, 9 April 2015

Dragons!

A few months ago the little guy turned 5 and we had a "How to Train Your Dragon" birthday party for him. Many hours were spent browsing Pinterest and the internet in general, and we came up with a few games/activities to keep the kids busy. But first Mr almost 5 insisted on a Toothless costume...

So I made one up as I went. I was originally going to have the wings on the back and the sleeves would be Toothless' front legs, but the little guy wanted wings he could flap with his arms and I realized that was going to be way easier to do, so we went with that... The 'top' over laps in the front and does up with a bit of velcro at the neck. The tail goes on like a belt and again does up with velcro. Once Toothless was finished the little guy requested his sister be Stormfly, but that was just a bit beyond what I was willing to do, so we rummaged through the little miss's closet and came up with an Astrid costume instead.


On party day we set up a shield decorating station where the kids could decorate their own shields. This was good to get the kids involved in something as soon as they got in the door, and also kept them busy while waiting for the other dragon trainers to arrive. I pre-made the shields from cardboard, tape & ribbons so the kids could hold them on their arms. We just put out our stock of coloured pencils & markers and the kids loved it.


Next the kids needed to earn a sword to go with their shields, so we played pin the tail on the Toothless. I had planned to make swords, but then I found some inflatable ones for $1 each and figured there was no way I could make anything for cheaper, and they were nice and safe to be played with even after the inevitable sugar rush. Everyone got a sword, but they were handed out in order of who got Toothless' tail closest to the right spot.


After a bit of sword fighting mayhem, we played another game... Feed the Gronckle. Every good dragon trainer knows that gronckles eat rocks, so I made up some rocks out of scrunched up newspaper covered in tape. I printed out a picture of a gronckle and stuck it to a large box. I cut out the bottom of the box and also the mouth of the gronckle, and the kids took turns throwing rocks into the mouth. It was great fun, and the kids kept going back to this one throughout the party.  


 And then one last organized game before cake time... It was our own little version of sheep racing.
The kids lined up into two teams and took turns putting a sheep pom-pom between their knees and delivering the sheep past the line placed at the other end of the room (without using their hands). If they dropped their sheep they had to go back and start again. Again, lots of good fun and the kids really worked together to help each other out with this one. It was pretty much impossible to get a photo of this one, sorry... But then there was cake, a fire breathing cake even!


The party finished up with opening presents and then running around the deck and more sword fighting - fortunately the hanging balloons were a favourite target.


Saturday, 10 January 2015

Welcome to 2015

Looking back at the past year I see that I haven't added to this blog since May 2014... it's now 2015. Oops! I'm not much of a new years resolutions person, but even if I was I can't say I'd resolve to post more in the coming year... we'll just have to see how things go. ;)

Once again I've been doing far more actual crafting this past year than writing about it. I expect this coming year will be similar, with the addition of joining a craft challenge group Iron Craft 2015 over at Just Crafty Enough. I was looking for new inspiration and something to keep me creative and thinking outside of the box. At this point I'm thinking it would be quite possible for me to pop up a quick post showing my craft challenge creation, or maybe a round up every month or two (a new challenge comes out fortnightly), but again we'll just have to wait and see.

But for now I thought I'd whack up a whole lot of photos of a few of my favourite crafts from this past year. I may get inspired to do a write up on some of them in the future, so if there's anything you see that you'd like to know more about leave me a comment and I'll see what I can do.

And happy 2015 everyone!!!!!

Jet Pack
I made a handful of these for the school gala
& they sold out in record time!

R2D2 Crochet Beanie


New dancing bag for the little guy -
a Star Wars drawstring backpack.  
 
Pencil cases.
Great to have around to add to birthday presents etc,
and an excellent way to use up scraps of fabric.

The little miss had a Frozen themed birthday party this year.

Making marshmallow Olaf's at said Frozen party.

I discovered the joy of Spoonflower!
A selection of items I created using custom made Irish dancing fabric. 

Kitty Scoodie
A scarf, hat & pockets all in one!

Crochet Ripple Blanket
A special gift for my Mom.

Toothless fingerless gloves.

The little miss really got into making friendship bracelets this year -
she's done various knotted ones as well as many on her rainbow loom.
 
The little miss learned how to use the sewing machine, and did a pretty good job too!

I've done a lot of crocheting for a great organisation called Little Sprouts.
They give out baby packs to families in need, and these cowls were
included in some of the packs as a little gift especially for the mums.

DANCING! So much dancing!
I made the little guy a new dancing vest and a new busking costumes for the little miss.

Lots of new PJ's have been made.

Lollipop lips & mustaches.
These were another hit at last years school gala and are
great party favours or just for fun treats. 


Both kids got new curtains, Star Wars for the little guy and 'fancy'
green & gold ones for the little miss - hers were a bit too tricky to get a good photo of though.

The little guy had a How to Train Your Dragon
party this year.

Toothless costume for the birthday boy!

I made this crocheted collar as a practice in case I decide
to put one on the little miss' next dancing dress.
I love how it turned out and had to find a use for it!


A king/knight's costume for the little guy.

Cookies!
Christmas dresses & clovers for the end of year dancing show and Angry Bird cookies for a bake sale.

Many more things were made throughout the year, and I'm sure many more will be made this year. Hopefully I manage to document a few more in the next little while though.


Saturday, 24 May 2014

Frozen Ice Ribbons/Force Lightning Gloves


 It's birthday time again... I've been party planning (searching Pinterest) for the little miss's upcoming birthday, she wants a Frozen party, and came across these Frozen inspired icy snow gloves. I thought they'd be fun for the girls to dance around to the songs from the movie with icy ribbons swirling all around them. I've been crocheting a lot lately, and figured instead of buying cheap gloves and sewing ribbons to them as per the link above, I thought it would be nice to crochet some fun finger-less gloves and make the ribbons detachable so that the gloves would actually be useful after the party was over. I altered a basic adult finger-less glove pattern I already had in my library and the little miss helped me to pick out some 'icy' colours from my yarn stash. We found enough colours that were suitable so that every party guest will get a totally unique set of gloves.

All of the gloves were crocheted a while ago, but I had yet to sort out any ribbons for them. Today was a pretty miserable day and we ended up putting the Frozen blue ray on and I was convinced by the little miss to attach some ribbons to her pair so that she could dance around with them to the songs in the movie. They were a hit! (Now I just have to attach ribbons to the other 6 pairs...)


While dancing around, the little miss came up with a genius idea - a black pair for her Star Wars obsessed brother so he could use them for force lightening. So I got my crochet hook, some black yarn, and some ribbons (the little guy insisted on black and blue) and within an hour a pair of force lightning gloves were on the little Sith Lord's hands and forcing pretty much everything in sight!


Note: It's nearly impossible to get a photo of how cool these actually look when the ribbons are flying around!

Sunday, 5 January 2014

Flying Comet - Tutorial

Flying comets are easy & inexpensive to make and super fun to play with. My kids love to swing them around by their ribbons and then watch them fly as they let go! I've seen several variations of this flying toy, but a tutorial for mine is below.

Supplies needed:

  • 2 scraps of fabric cut into rectangles of approx 12 x 15 cm (you can use any durable, non stretch fabric scraps that are not too stiff - i.e. cotton, cotton-poly blend, cotton drill)
  • ribbon - 3 to 6 strands each measuring approx 70 to 80 cm long
  • thread to match
  • approx 1/3 cup popcorn kernels*
  • scissors
  • pins
  • lighter or matches
  • sewing machine.
*You can substitute the popcorn kernels with plastic beads or something similar if you prefer. I like to use popcorn kernels as they move well in the comet; they're inexpensive; they last well; and they're weighty enough to fly nicely, but not too hard if the comet accidentally flies into your face!

Instructions:

1.  Place the fabric pieces right sides together and cut the corners on both pieces on one of the short ends so they're rounded.

2.  Singe/melt all ends of the ribbons with your lighter or matches to stop them from fraying.

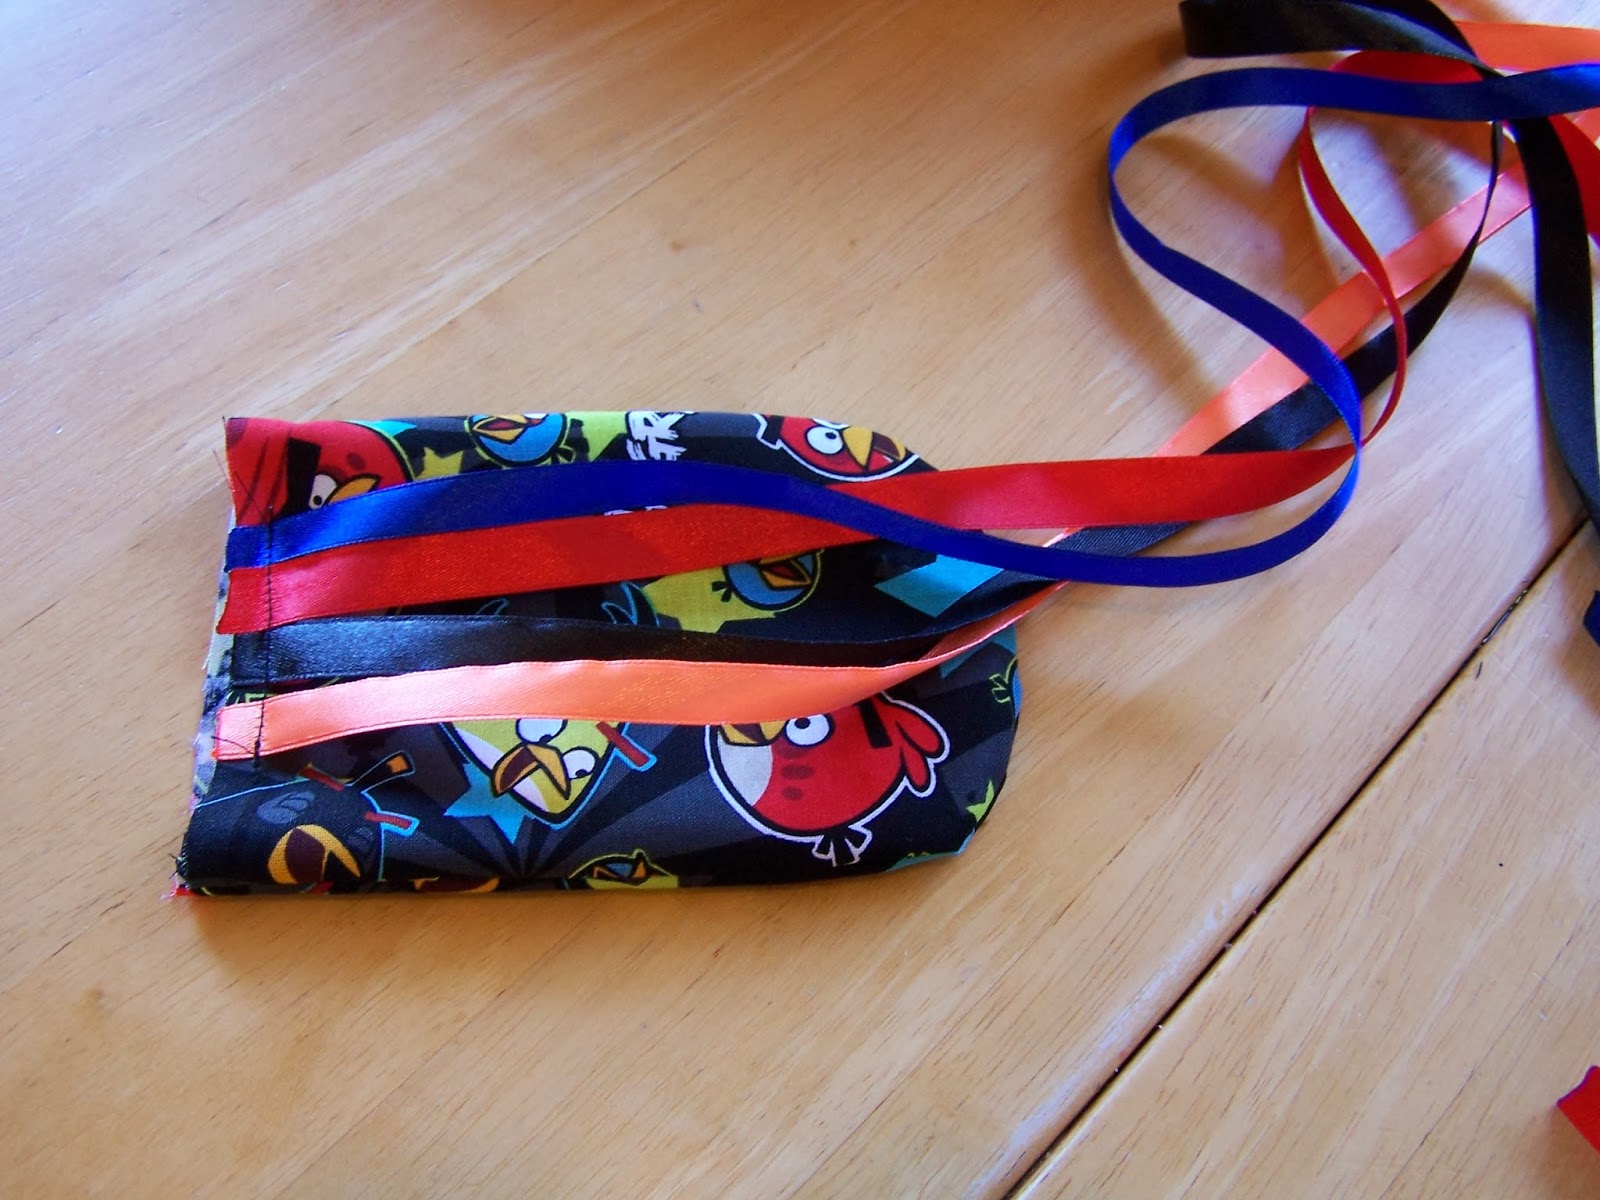
3.  Pin the ribbons to the right side of one of the fabric pieces along the short straight edge with the ribbon ends running the length of the comet and over.


4.  Stitch along the short edge to keep the ribbons in place.

5.  Place both pieces of fabric right sides together and pin around the long and rounded edges and sew the fabric together on all three edges - make sure not to catch any of the ribbons in your stitching.


6.  Cut small slits in the curved edge to make it turn out nicely. Make sure your cuts don't go as far as the seam!


7.  Turn your comet right way around. Your ribbons should fall freely from the open end.


8.  Fill the comet with popcorn kernels (or your chosen substitute).

9.  Fold your raw edges into the comet with the ribbons hanging out and pin. Make sure the stitching holding your ribbons in place is in the fold.


10. Sew the comet closed and top stitch around all edges.

Your comet is now ready to be played with!!!!!


 Note: Taking action shots of these is not the easiest thing to do (and I was too impatient to wait for the sun to move to a better angle)! But these photos should give you an indication of how the comets fly. ;)